
PCB Etching with Air Regenerated Acid Cupric Chloride
Well, I have produced quite a lot of more or less successful electronic projects built on PCB. I have also tried a few technologies of etching. I started with hydrochlorid acid mixed with hydrogen peroxide. But the reaction seemed too furious to me. I made many PCBs in ferric chloride - it was quite the opposite. The solution got exhausted very quickly, but I didn't want to make a new one for each board - so I ended with etching time of some several hours.
The problem was very simple: How to have always (usually on Sunday morning) fresh solution available? So I started googling the Internet for ferric chloride refreshing procedures and accidentally found something which immediately caught my eye:
Etching with Air Regenerated Acid Cupric Chloride by Adam Seychell
Thank you, Adam.
Etching Tank
I have the etching tank made of synthetic glass. It is 25 cm high, 20 cm wide and 4 cm deep - well, I call it an Aquarium for Flat Fish. I came to the dimensions after some thinking. When filled up to 20 cm, the volume is 1.6 liters, which as described in the article linked above is enough to etch one square decimeter of average PCB.
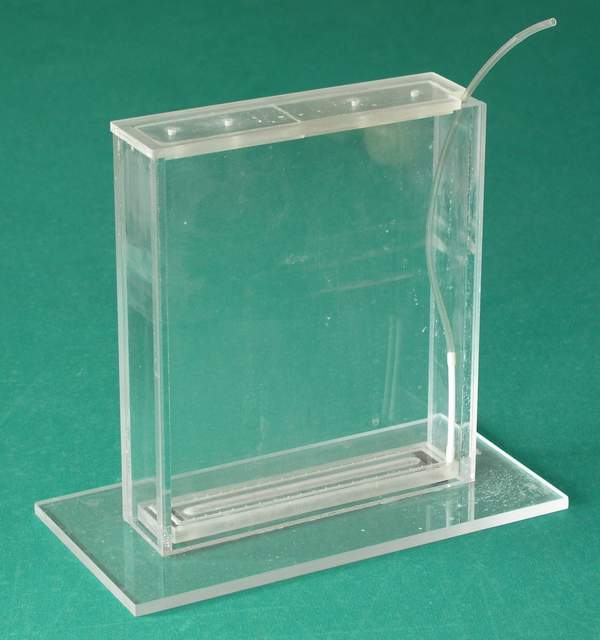
The main problem to solve was to let the solution aerated properly - i.e. produce a lot of as small as possible bubles. Well, actually, I haven't succeeded so far. First I made a difusser of synthetic glass. The experiments in a bucket of water seemed to be promissing. But when I put it into the solution it didn't sink - simply, the specific gravity of the diffuser was lower than that of the solution. So I improved the design and inserted a steel bar into the second one. It works perfectly for etching, but the bubles are too big for efficient aeration. I also tried an air stone used for aquariums, but when drowned it softened and I broke it apart accidentaly.
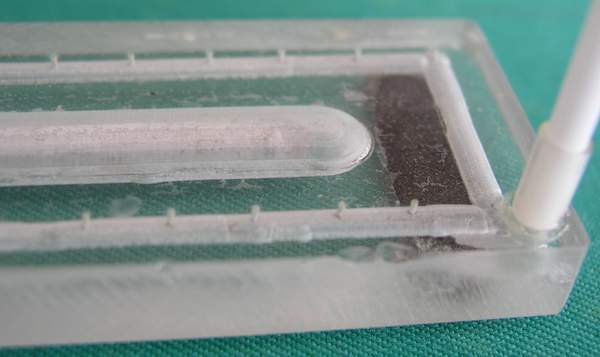
One more advice concerning the diffuser. Make the holes as small as possible (I used some 0.4 mm drill) and start with just few. When you see that the air pump can give much more air (press the air tube), you can drill more holes between. When the pump isn't able to give enough air, only the holes near the intake will produce bubbles.
Preparation of the solution
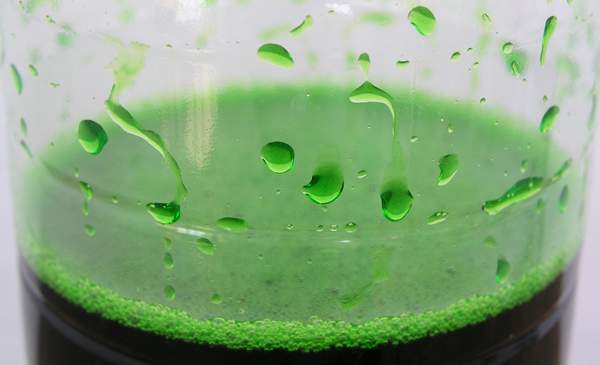
I didn't want to cheat. That's why I didn't use hydrogen peroxide nor I bought the cupric chloride, but I followed the procedure using just hydrochlorid acid and metal copper. As mentioned above, the biggest problem was to make the aeration proccess efficient. It took more than two weeks to prepare the solution. But I must say, that the last phase, when the main changes in color could be seen, took just a few hours. The resulting color should be something like that:
Etching
The etching time is about 20 minutes. Actually, I didn't measure any of the parameters as Adam recommends. I just checked the color of the etchant and added some concentrated hydrochlorid acid before etching. I am satisfied. More important then the speed I find the fact that, most probably thanks to the bubbling, the process is perfectly even.
When you look back to the picture of the etching tank, you can see lid on it. There are two functions of it. One of them is to avoid the etchant splashing around, the other is I use the holes in the lid for hanging up the PCB. I drill two small holes in corners of the PCB - mostly there are some designed anyway - and using a thread I hang it into the etchant. Pulling up the thread I can easily check the etching stage.
P15/1, K15 - prosinec 2006, naposledy aktualizováno: leden 2024